
Category

Staying in touch and working together effectively is vital, especially for distributed teams or when engaging supporters. These communication and collaboration tools help your staff and volunteers chat, meet, and work together in real-time. Many have free versions or special nonprofit plans to keep everyone connected at low cost.
19. Slack
What it does: Slack is a popular team messaging platform that provides organized communication via channels, direct messages, file sharing, and integrations with other apps.
Why it’s great: It vastly reduces internal email clutter and helps teams communicate instantly. The free version of Slack is often enough for small organizations, allowing unlimited users and messages (with a searchable history limit of 90 days). Crucially, Slack has a Slack for Nonprofits program – workspaces with up to 250 members can get a free upgrade to the Standard (Pro) plan, and larger orgs get 85% off Slack’s paid plans. This means even medium-sized nonprofits can use Slack’s advanced features (like unlimited message history, group video calls, and better app integrations) at either no cost or a fraction of standard pricing. Slack keeps your team engaged and responsive, whether they’re in the office or remote, and you can also invite external partners or volunteers into certain channels as needed. Many startups similarly rely on Slack’s free tier in early stages to coordinate work.
How to get it: Create a free Slack workspace to start. To apply for the nonprofit discount (free Standard plan or 85% off Plus plan), fill out Slack’s Nonprofit application form on their website with your organization details. Approval usually takes a week or two. Once applied, you’ll have premium features unlocked. Then set up channels for various topics/teams (e.g., #general, #fundraising, #projectX) and onboard your team by sharing the invite link Slack provides.
20. Microsoft Teams (Microsoft 365)
What it does: Microsoft Teams is a collaboration hub that includes group chat, video conferencing, file sharing, and integrates deeply with Microsoft 365 apps (Word, Excel, PowerPoint, SharePoint, etc.).
Why it’s great: For nonprofits, Microsoft’s offer is unbeatable: eligible organizations can get Microsoft 365 Business Basic free for up to 300 users. This includes Teams, along with web versions of Office apps, 1TB of OneDrive storage per user, business-class Outlook email, and more – all free under Microsoft’s grant. That means your whole team can use Teams for meetings and chat (internally and with external guests) and collaborate on Office documents in real-time, without licensing costs. Teams itself is a strong communications tool: you can have chat channels (like Slack), schedule and hold virtual meetings (with recording and screen sharing), and even make voice calls. It also ties in calendar and email availability, making scheduling easier. For startups that might not qualify for the nonprofit grant, Teams has a free version too (with some limitations like 60-minute meetings). But if you do qualify, the value of Microsoft’s donated cloud software is immense – essentially providing a complete digital office.
How to get it: First, apply for Microsoft for Nonprofits (you’ll need to validate your NPO status, often via TechSoup South Africa). Once validated, you can claim the Microsoft 365 Business Basic (Nonprofit Staff Pricing) offer for free in the Microsoft 365 admin center. Assign licenses to your users. They can then sign into Teams via the desktop app or web. If you already have a small team and want to pilot, you can also try the free Teams plan (sign up with any email on Microsoft’s Teams free page) – but the nonprofit grant gives you the full suite, so that’s the goal. Microsoft also provides discounts on higher plans if you need desktop Office apps or additional security features.
21. Google Workspace (Google for Nonprofits)
What it does: Google Workspace (formerly G Suite) is Google’s suite of productivity and collaboration tools, including Gmail for custom domain email, Google Drive, Docs, Sheets, Slides, Calendar, and Google Meet for video meetings.
Why it’s great: Through Google for Nonprofits, eligible nonprofits get Google Workspace for Nonprofits at no charge (equivalent to the Business Starter edition). This provides professional email addresses (you@yourorg.org) and the full range of Google’s cloud apps for your team. Practically, that means you can use Gmail with your domain, store and share files on Drive, collaboratively edit documents/spreadsheets, and hold video meetings via Google Meet – all for free. It’s a huge cost saver and also includes generous features like 30GB cloud storage per user on the free nonprofit edition. Google’s tools are user-friendly and widely used, so your staff and volunteers might already be familiar with them. Additionally, Google Meet now supports up to 100 participants even on the free tier, which is great for virtual workshops or board meetings. If your organization uses volunteers or has rotating staff, having everything on Google (email, docs, calendars) simplifies onboarding and offboarding.
How to get it: Sign up for Google for Nonprofits and once approved (Google will verify your charity status via TechSoup), you can activate Google Workspace for Nonprofits from the GfN dashboard. You’ll set up your domain’s email through Google and create user accounts. If you’re a startup (for-profit), you won’t be eligible for GfN, but you can use Google’s free tools with personal accounts (like free Gmail/Drive) or consider Google Workspace’s free 14-day trial and then their pricing is reasonable for small teams. Some startup incubators also provide Google Workspace credits, so explore that if applicable.
22. Zoom
What it does: Zoom is a leading video conferencing tool that enables virtual meetings, webinars, and online events with ease. Participants can join via computer or phone, with or without a Zoom account.
Why it’s great: Zoom’s free plan allows unlimited one-on-one meetings and group meetings up to 40 minutes with up to 100 participants – sufficient for many small nonprofits or team check-ins. It’s known for its reliability and simple user experience (even less tech-savvy participants can usually get it working). During the COVID-19 pandemic, Zoom became essential for nonprofits to run programs and for startups to coordinate remotely. Many donors and stakeholders are now used to Zoom meetings, so having it in your toolkit is important. Nonprofits can also get discounted Zoom licenses (Zoom offers 50% off for verified nonprofits via TechSoup or direct) if you need longer sessions or large webinars. With screen sharing, recording, breakout rooms, and registration features, Zoom helps you engage your team or audience anywhere. Also, consider that hybrid events (some people in-person, some on Zoom) are more common now – Zoom can facilitate that connectivity.
How to get it: Download Zoom and sign up for a free account to start hosting meetings. The free account has the 40-minute limit for groups, which you can work around by having intermissions or simply restarting the meeting if needed. If you find you need more, look into Zoom’s nonprofit program via TechSoup South Africa. On TechSoup, you can request a donated Zoom Meetings Pro 1-year license for a small admin fee or access discounts on larger plans. Once you have your Zoom account set up, schedule meetings through the Zoom app or web portal, and share the join links with participants.
23. WhatsApp Business
What it does: WhatsApp Business is a version of WhatsApp tailored for businesses and organizations to communicate with constituents. It features business profiles, labels to organize chats, quick reply templates, and automated greetings or away messages.
Why it’s great: In South Africa, WhatsApp is ubiquitous and a powerful channel to reach people. Nonprofits use it to send updates to beneficiaries or coordinate with volunteers, while startups use it for customer support or marketing. WhatsApp Business is free and allows you to set up a profile with your organization’s info (address, description, hours, website) which lends credibility. You can also use broadcast lists (to send one-way updates to many contacts who have opted in) and groups for interactive discussion (e.g., a volunteers group). It’s mobile-first, which suits contexts where email is less effective. Many communities engage better via WhatsApp than email or social media. By using WhatsApp Business, you keep work and personal messages separate, and you can utilize features like labels to categorize chats (e.g., “Donor”, “Volunteer”, “Client”), making follow-ups easier. It also supports end-to-end encryption like standard WhatsApp, so conversations are secure.
How to get it: Download WhatsApp Business from your phone’s app store (Android or iOS). Register with your organization’s phone number (you might use a dedicated SIM for this purpose). Set up your business profile with a picture (e.g., your logo) and details. Note that one number can only be used on one device at a time (unless you use WhatsApp Web for desktop access). You might want to publish your WhatsApp number on your site or social pages so people know they can reach you there. Be mindful to get consent before adding someone to a broadcast or group to comply with communication best practices.
24. Miro
What it does: Miro is an online collaborative whiteboard platform. It provides an infinite canvas where teams can brainstorm, map processes, create diagrams, and work together in real-time using sticky notes, drawings, and other elements.
Why it’s great: For planning, strategy sessions, or interactive workshops, Miro’s digital whiteboard is fantastic. The free plan gives you 3 editable boards with core features, which is often enough for occasional brainstorming or mapping exercises. It allows multiple people to add and edit content simultaneously, which mimics the experience of an in-person workshop when you’re remote. Nonprofits can use it for strategic planning (e.g., SWOT analysis with digital sticky notes), mapping community assets, or doing a virtual icebreaker with staff. Startups might use it for product roadmapping, UX journey mapping, or scrum retrospectives. Miro offers a free Educational plan for staff/students and has a nonprofit discount on paid plans (usually 30% off for nonprofits). It integrates with tools like Teams and Slack too. The visual and interactive nature of Miro can spark creativity and engagement that a standard conference call might not.
How to get it: Sign up for a free Miro account to start using the basic boards. You can create and share a board link with team members (they can edit as guests on the free plan). If you are an educational nonprofit or if some team members have .edu emails, you might qualify for the free Education plan (which provides more boards). Otherwise, if you love the tool and need more, inquire about their nonprofit pricing for Team/Business plans. Miro’s template library can help you get started with pre-made structures for brainstorming, strategy, or design thinking exercises.
25. Discord
What it does: Discord is a free voice, video, and text chat platform originally popular with gaming communities but increasingly used by organizations for community engagement and team communication. It lets you create a server with multiple channels (text or voice) and control permissions for different roles.
Why it’s great: It’s completely free to set up a Discord server, and you can have an unlimited number of members. For youth-focused nonprofits or tech startups, Discord can be a space to build an engaged community through chat and live audio/video rooms. For example, a coding education nonprofit can have a Discord where students ask questions, or a startup can host an AMA (Ask Me Anything) session on a voice channel. Discord supports bots to automate tasks (like sending welcome messages or running polls) and has rich features like screen sharing, event scheduling, and community moderation tools. While not as formal as Slack or Teams for internal use, it shines as a community-building tool. Some NGOs use Discord to coordinate hackathons or keep alumni networks active. It essentially gives you a customizable community forum + chat hybrid without any hosting costs.
How to get it: Create a Discord account (free) and then use the “+” button in the Discord app to create a new server. You’ll be the admin by default and can then invite others via invite links. Set up channels by topic (e.g., #announcements, #general-chat, #QnA) and any voice channels needed. Share the invite link with your community through your usual outreach. Define some basic rules for conduct and perhaps assign moderator roles to a couple of trusted members. Discord offers Community Server settings once your server grows, which provide extra tools like analytics and discovery, so explore those if relevant.
26. Workplace from Meta (Facebook)
What it does: Workplace (by Facebook) is an enterprise communication tool that mirrors Facebook’s interface (with a news feed, groups, chat, live video) but is private for your organization. It’s essentially Facebook for internal use.
Why it’s great: It provides an informal, familiar way for staff and volunteers to connect – leveraging the social network style that many people are used to. You can post updates, share photos or files, and use features like polls or live video for all-hands meetings. For nonprofits with distributed teams or a lot of part-time volunteers, Workplace can be easier to onboard folks to (since it feels like Facebook) compared to introducing a whole new tool. Workplace offers free Standard tier for nonprofits historically, and they announced Workplace for Good which gave certain plans for free to nonprofits (it’s worth checking current offerings, as pricing models have evolved). Even without a discount, the core Workplace features for a smaller team might be free or low-cost. Another benefit is the Workplace Chat app which supports messaging and video calls like Messenger but within your org. Workplace also allows Multi-Company Groups, which is useful if you collaborate with outside partners or want a board/external advisory group space.
How to get it: Check out the Workplace for Nonprofits page. You can apply there for discounted or free access. Typically, verified nonprofits got the Workplace Advanced plan free for up to 50 users and discounts beyond that (this may have changed to more of a trial since 2021). Once set up, invite your team via email. They do not need Facebook personal accounts – Workplace accounts are separate (though users can link them if they want for easy switching). Create groups for different teams or topics (e.g., a “Social Media Team” group, a “Wellness” group for fun posts, etc.). Use the news feed for major announcements. Because Workplace can blend work and social, set some guidelines on work-appropriate posting, but otherwise enjoy a platform that encourages community-building within your org.
Disorganised comms? Let’s fix that.
Whether it’s Slack, WhatsApp, Google or Teams, I help you set up centralised comms systems that reduce confusion and save time. See my systems services or schedule a quick consult.
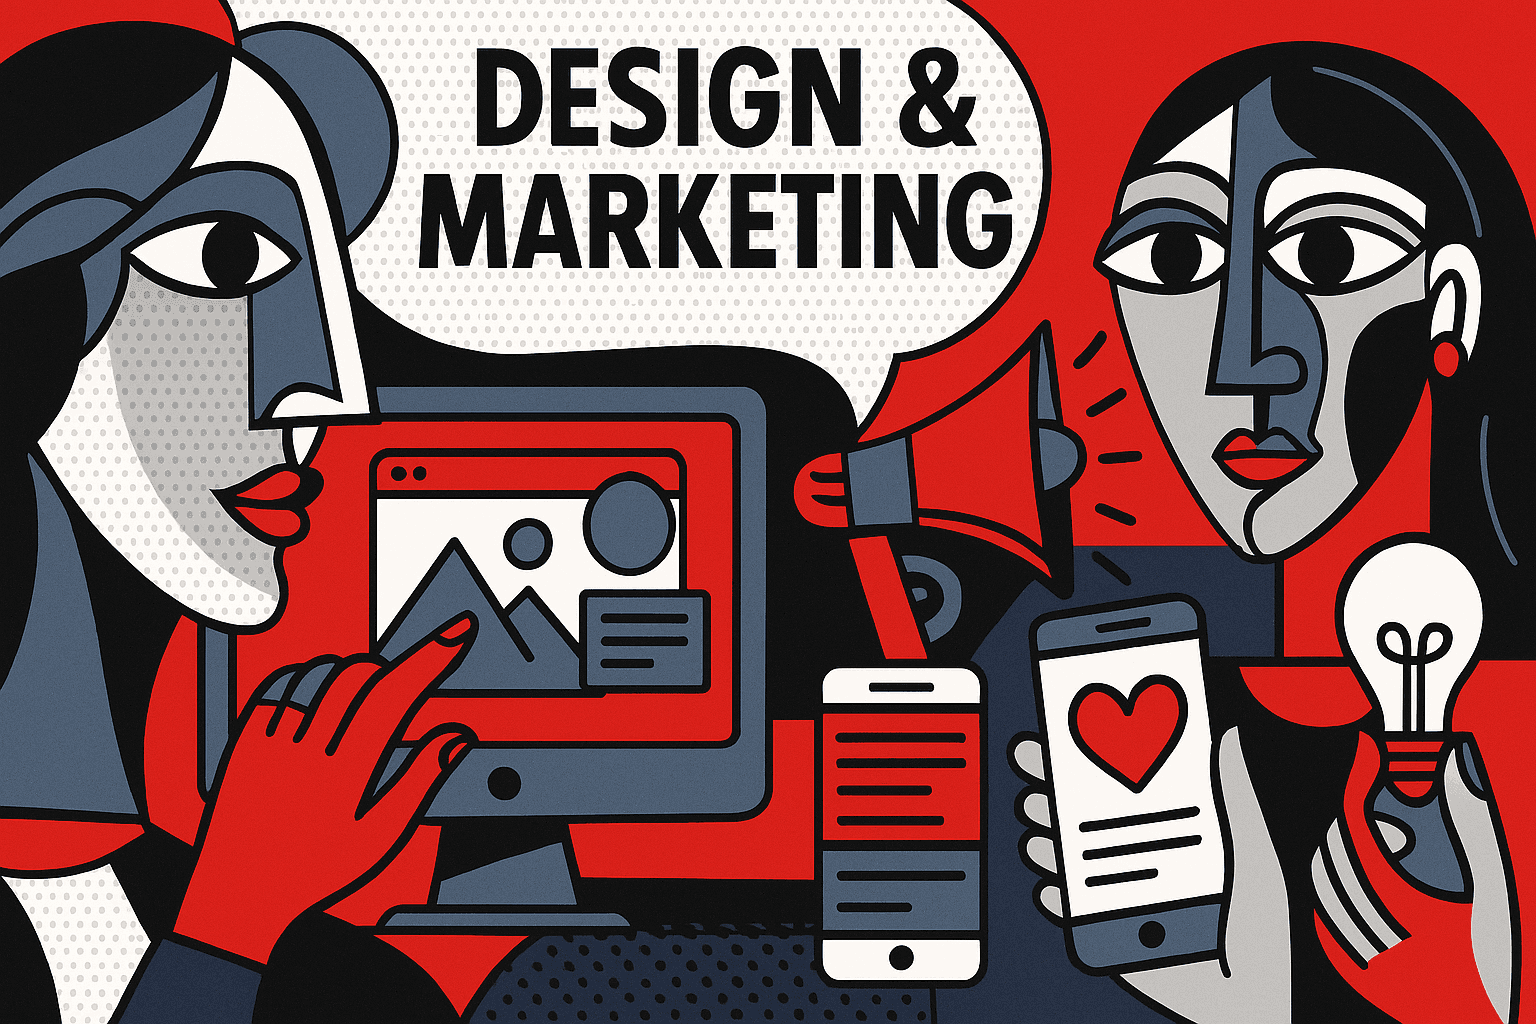
Eye-catching visuals and effective marketing can amplify your message without requiring a big budget. These design and marketing tools help you create graphics, edit media, manage social media, and run campaigns for free or at minimal cost – ideal for promoting your nonprofit or startup product on a shoestring budget.
27. Canva
What it does: Canva is a user-friendly online graphic design tool that lets you create professional-looking images, flyers, social media posts, presentations, and more using templates and drag-and-drop editing.
Why it’s great: Canva’s free tier is generous, but even better, Canva Pro is free for registered nonprofits. This means eligible nonprofits get access to all premium templates, 75+ million stock photos, videos and graphics, and advanced features (like background remover, brand kit, etc.) at no cost. Canva is perfect for teams with no graphic designer – anyone can quickly whip up posters, Instagram graphics, or annual report visuals. It also supports collaboration, so multiple people can work on a design or share templates across the team. For startups, while Canva Pro isn’t free unless you’re nonprofit or education, the free version still offers a lot (and you can pay monthly only when needed). By using Canva, you maintain a high-quality brand image on a zero or very low budget, and save time with its pre-made layouts.
How to get it: Sign up for Canva with a free account. Nonprofits should then apply for Canva’s nonprofit program via the Canva website (you’ll need to fill a form and provide proof of status). Approval can take a week or two, then your account is upgraded to Canva Pro for up to 50 team members for free. If you’re a startup, consider the Canva Pro 30-day trial during a big marketing push. In Canva, explore the templates by category (e.g., “Poster”, “Facebook Ad”, “Newsletter”) and start customizing – it’s very intuitive.
28. Adobe Creative Cloud (Nonprofit Discount)
What it does: Adobe Creative Cloud is the gold-standard suite of design software, including Photoshop (image editing), Illustrator (vector graphics), InDesign (print/layout design), Premiere Pro (video editing), and more for graphic design and media production needs.
Why it’s great: For organizations that need advanced design capabilities, Adobe’s tools are unmatched. Through TechSoup and Adobe’s nonprofit program, charities can get Creative Cloud at a significant discount. For example, TechSoup South Africa offers Adobe Creative Cloud All Apps plan for a fraction of retail (the exact admin fee can vary, but it’s heavily discounted). This puts professional-grade software within reach. With it, you can design polished annual reports, edit high-quality videos, or produce outreach materials that rival big agencies. Even if only one person on your team is a design whiz, having the software enables them to produce content that can elevate your brand and storytelling. Adobe Spark (now Adobe Express) is also included, which is an easy tool for quick designs and short videos. In short, if your marketing or media demands are high, getting Adobe via a nonprofit discount ensures you don’t have to compromise on quality due to cost.
How to get it: In South Africa, register with TechSoup South Africa if you haven’t already. Once validated, browse the product catalog for Adobe offers. Typically, you’ll find “Adobe Creative Cloud All Apps 1-year subscription (donation)” which you can request. After paying the admin fee, you’ll get a redemption code to use on Adobe’s website. Then, download the Creative Cloud apps you need. Remember that it’s a subscription – each year you’ll need to renew via TechSoup (which is still far cheaper than retail). If you’re a startup, Adobe doesn’t have a formal startup program, but you might look into the Adobe Express free plan or use open-source alternatives until you can afford Creative Cloud.
29. GIMP & Inkscape (Open Source Design Tools)
What it does: GIMP is a free open-source image editing program (a powerful alternative to Photoshop), and Inkscape is a free open-source vector graphics editor (alternative to Illustrator).
Why it’s great: These tools cost nothing but offer many of the capabilities of their Adobe counterparts. GIMP lets you do photo retouching, image composition, and graphic design. Inkscape allows creating logos, illustrations, and scalable vector art. For cash-strapped teams, using open-source software avoids subscription fees entirely. They run on Windows, Mac, and Linux. While the interface and some workflows might not be as slick as Adobe’s, the functionality is robust and constantly improving thanks to the open-source community. Many designers got their start with GIMP and Inkscape; they can handle common tasks like removing backgrounds, layering images, designing simple flyers, or exporting print-ready graphics. By incorporating these into your toolkit, you can empower volunteers or staff with creative interests to produce needed graphics without licensing barriers.
How to get it: Download GIMP and Download Inkscape from their official websites (they are lightweight downloads). There are plenty of free tutorials online for both (e.g., on YouTube or their documentation sites). If you’re already familiar with Photoshop/Illustrator, expect some adjustment in tool names and shortcuts, but core concepts carry over. Encourage your team to give these tools a try for basic tasks – you might find they cover 80% of your needs. For more specialized design (like multi-page layouts or advanced video editing), look at other free tools (Scribus for layout, DaVinci Resolve for video, etc.), but GIMP and Inkscape are great starting points for graphics.
30. Mailchimp
What it does: Mailchimp is an email marketing platform that allows you to design email newsletters, manage mailing lists, and track the results of your email campaigns.
Why it’s great: Mailchimp’s free plan lets you send up to 10,000 emails per month to up to 2,000 contacts (as of recent changes, new free accounts might be 500 contacts with 2,500 sends, so check current limits). This is fantastic for sending donor updates, newsletters, or startup product announcements at no cost. The drag-and-drop email builder and template gallery make it easy to create professional-looking emails without needing a graphic designer. Mailchimp also handles email deliverability, unsubscribe management, and basic analytics (open rates, click rates), which saves a lot of hassle compared to sending via regular email. Plus, Mailchimp offers a 15% nonprofit discount on paid plans (and 10% off for using two-factor authentication) if you ever need to upgrade for larger audiences. Nonprofits particularly appreciate features like segmentation (to target donors vs volunteers differently) and automation (e.g., welcome email series for new subscribers) which are available on paid tiers. Startups often stick to the free tier until their mailing list grows beyond the limit. Overall, Mailchimp helps you stay in touch with your community in a scalable and trackable way.
How to get it: Sign up for Mailchimp with a free account. Set up your audience (import any existing contact list via CSV, making sure you have permission to email those contacts). Use Mailchimp’s Email Designer to craft your first newsletter – they have templates for common layouts or you can create your own style with your logo and colors. Before sending, test the email by sending to your team. As your list grows or you need more advanced features, consider applying the 15% nonprofit discount by verifying your 501(c)(3) status (Mailchimp’s support can guide you on this, typically you email them proof). Also, enable two-factor authentication on your account to get an additional 10% off (Mailchimp’s way of encouraging security). The discounts apply to paid plans, so on free you won’t see a difference until you upgrade.
31. Buffer
What it does: Buffer is a social media management tool that allows you to schedule posts across various social media platforms (Facebook, Twitter, Instagram, LinkedIn, etc.) and manage them from one dashboard.
Why it’s great: Buffer’s free plan includes 3 social channels and up to 10 scheduled posts per channel at a time – enough for a basic presence. This helps you maintain a consistent social media presence by batching your posts. For example, you can line up a week’s worth of Facebook and Twitter posts in one go. Buffer’s interface is clean and straightforward, making it easy for beginners. For nonprofits and startups looking to grow their audience online, scheduling tools are a lifesaver because you can post even when you’re busy with other tasks or events are happening in off-hours. Buffer also supports team collaboration on higher plans and provides analytics on engagement. Importantly, Buffer offers 50% off to nonprofits on all its paid plans, and also occasionally extends their free plan limits during crises or special programs. With a Pro or Premium plan (at half price), you get features like Pinterest scheduling, more posts in your queue, and social media analytics to gauge what content works best. But even the free Buffer can drastically cut down the manual work of logging into each platform and posting in real time.
How to get it: Create a free Buffer account. Connect your social media accounts (you’ll need to authorize Buffer to publish on your behalf). Then start scheduling posts: you can craft a post and choose which platforms to send it to, tweak the copy per platform if needed, attach images, and set the date/time for posting. Buffer will handle the rest and even suggest optimal times if you want. If you find you need more capacity (more than 10 posts in queue, or more accounts), check out Buffer’s Essentials plan and remember to apply for the nonprofit 50% discount before purchasing – you can do so by contacting their support with your nonprofit documentation. Buffer also has a content suggestions feed and a Pablo tool for quick image creation, which can be handy for spicing up your posts.
32. Hootsuite
What it does: Hootsuite is another popular social media management platform. Like Buffer, it lets you schedule and monitor posts across multiple social networks in one place. It’s known for its dashboard where you can see multiple streams (e.g., your feed, mentions, messages) side by side.
Why it’s great: Hootsuite’s free plan was recently limited but still allows managing 2 social accounts and scheduling up to 5 messages at a time – which might be enough for a very small operation. Its strength is in monitoring and engagement: you can set up streams to watch hashtags, keywords, or your incoming messages, making it easier to reply and interact from one interface. Hootsuite also offers nonprofits a discount on their Professional and Team plans (typically 20% or more – you need to contact sales). On a paid plan, you can manage a greater number of social profiles and get robust analytics and team collaboration features. One advantage Hootsuite has is deeper functionality for larger social teams – if you grow to having multiple people managing social or need things like approval workflows for posts, Hootsuite handles that well. They also integrate with Facebook ad management and have content curation tools. If Buffer or simpler tools aren’t meeting your needs, Hootsuite might be the next step up, and the nonprofit discount makes it more accessible.
How to get it: Sign up on Hootsuite and choose the free plan to start (it might prompt a trial of paid – you can downgrade to free after the trial). Connect up to 2 social media accounts (e.g., Twitter and Facebook Page). Use the Planner to schedule some posts and set up streams on the dashboard for things like “My Tweets”, “Mentions”, “Home Feed”, etc. Monitor how it helps your workflow. If you decide you need more, reach out to Hootsuite’s sales via their Nonprofit page – they will guide you through verifying your nonprofit status and applying the discount on the plan that fits your needs. For startups (non-nonprofit), Hootsuite doesn’t have special pricing, but consider if the free or lower-tier plan suffices or if Buffer’s discounted plan could be a cheaper alternative.
33. Google Ad Grants
What it does: Google Ad Grants provides eligible nonprofits with free advertising credit on Google Search – up to $10,000 USD per month to spend on text-based search ads. This allows your website to appear in Google search results via ads when people search for keywords related to your cause or programs.
Why it’s great: This is essentially free marketing money from Google. With Ad Grants, a charity can significantly increase its online visibility and attract new supporters, volunteers, or beneficiaries by targeting search queries that align with its mission. For example, if you run a youth education nonprofit, you can bid on keywords like “after-school programs Cape Town” and have your site show up at the top in the Ads section without spending actual money. The program provides $329 USD per day in free ad budget, which is plenty to experiment with different campaigns and messages. Many South African nonprofits and global NGOs use Ad Grants to drive traffic to their donation pages, volunteer sign-ups, and informational content. It essentially gives you a constant presence on Google Search, which would otherwise be very costly. There are some rules (like maintaining a 5% click-through rate, using geo-targeting, and not using single-word keywords or overly generic terms), but Google also offers free training and support for grantees. Startups aren’t eligible (it’s only for nonprofits), but startups can still consider Google Ads on a small budget or look for startup-specific ad credits (some cloud provider programs include marketing credits). For nonprofits though, Ad Grants is a game-changer for outreach.
How to get it: Ensure you’re enrolled in Google for Nonprofits and have a functioning website that meets Google’s criteria (the site should be substantive, load reasonably fast, and not have commercial activities as the primary purpose). Once in GfN, you can activate Google Ad Grants by following the steps which include: creating a Google Ads account with special settings (with USD as currency, etc.), filling out the Ad Grants eligibility form, and then building out a basic campaign following the Ad Grants guidelines. You might have to complete Google’s Ad Grants training module as well. Within a couple of weeks, you should be approved and see the $10k/month credit in your account. Then, start by creating campaigns for your key focus areas – e.g., “Donate” campaign targeting people searching to support causes like yours, “Services” campaign targeting those who might benefit from your programs, etc. Monitor and tweak regularly to make sure you’re using the grant effectively. Google also has a community and support specifically for Ad Grants to help you succeed.
34. Unsplash & Pexels (Free Stock Images)
What it does: Unsplash and Pexels are websites offering a vast library of high-quality photos that are free to use for any project (even commercially) without attribution. They have images contributed by photographers worldwide that you can use in websites, social media, print materials, etc.
Why it’s great: Need a stunning image for a blog post, brochure, or social media banner? These platforms save you from expensive stock photo licenses. You can find pictures of communities, nature, office scenes, events – whatever matches your story. Using compelling imagery in your marketing and presentations makes a big difference in capturing attention and conveying emotion, and with Unsplash/Pexels you have virtually unlimited choices at zero cost. For example, if you’re a health nonprofit making a flyer, you can get professional-grade photos of healthcare situations or happy families instead of relying on low-res or clichéd clipart. For startups, good imagery can make your pitch decks and landing pages look polished without hiring a photographer. The quality on these sites is very high because many photographers give away their “extra” shots to build reputation. The only consideration is these images can be popular, so you might see them elsewhere; but that’s a minor issue compared to the benefit of free visuals.
How to get it: Visit Unsplash or Pexels and search for keywords related to what you need (e.g., “education”, “Cape Town city”, “volunteers”). You can download images in high resolution. No login is required (though creating a free account lets you “like” and organize photos). While attribution isn’t required, it’s nice to credit the photographer when feasible, as a courtesy. Both sites have sections for videos too (Pexels especially) which can be useful for free stock video clips. Integrate these images into your Canva designs, website, or documents easily. If you have an Adobe Creative Cloud subscription, note that Adobe Stock gives some free assets too, but Unsplash/Pexels should cover most needs without any subscription.
35. WordPress
What it does: WordPress is a free, open-source content management system (CMS) used to build websites and blogs. It powers a huge portion of the web (over 40% of all websites), from simple nonprofit sites to large news outlets.
Why it’s great: WordPress itself is free to download and use, and it’s relatively easy to set up a professional-looking website using free or cheap themes and plugins. With WordPress, you can manage your own site content (pages, blog posts, images) without needing a developer for every change. Its popularity means there are countless free plugins to extend functionality – for example, plugins for donation forms, event calendars, multi-language support, social media feeds, and so on. The large community also means lots of tutorials and forums to help you. Many hosting providers offer one-click WordPress installation and even special nonprofit rates. By using WordPress, you avoid proprietary website builders that might lock you in or charge high fees. Instead, you maintain control over a site that can grow with you. And because almost every web developer is familiar with WordPress, if you need custom work, it’s easier to find help. For startups, WordPress can serve as a quick way to launch a marketing site or blog without investing in a custom build from scratch. Essentially, it gives you enterprise-grade web infrastructure (there are WordPress sites with millions of visitors) at a minimal cost – you only pay for hosting and any premium themes/plugins you choose.
How to get it: You have two main routes: WordPress.com or WordPress.org. For maximum flexibility, the WordPress.org route (self-hosted WordPress) is recommended. This means you need to sign up for web hosting (many options: local hosts like xneelo or international ones like Bluehost, SiteGround, etc.). Some hosts have nonprofit discounts or grants, so inquire. Use your host’s control panel to install WordPress (or use an auto-installer). Once installed, pick a theme (WordPress comes with default themes, or explore the theme repository for a design you like – many are free). Create pages like Home, About, Contact, and perhaps a Blog section for news updates. Install essential plugins: a security plugin (like Wordfence), a backup plugin, a forms plugin (e.g., Ninja Forms or Contact Form 7 for contact forms), and any specific ones (perhaps a donation plugin like GiveWP, which has a free core). If you prefer not to self-manage hosting, WordPress.com provides a free plan for basic blogs (your site will have a .wordpress.com address) or paid plans that include hosting and some support. Nonprofits can sometimes get WordPress.com discounts via the Digital Ocean Open Source program or similar, but those might be more for open source projects. As you build out the site, take advantage of WordPress’s large online community for guidance – chances are any question you have, someone has asked before on forums or StackExchange. Regularly update your WordPress core and plugins for security, which is easy to do from the dashboard. With WordPress, you’ll have a site that you own and can adapt endlessly as your nonprofit or startup evolves.
36. Yoast SEO (Website Optimization)
What it does: Yoast SEO is a popular WordPress plugin (with a free version) that helps you optimize your website content for search engines. It provides actionable suggestions to improve your pages’ SEO and readability.
Why it’s great: Getting your message out also means being discoverable on Google. Yoast makes SEO approachable for non-experts by guiding you to use keywords effectively, write good meta descriptions, and ensure your content is structured well for search. The free plugin covers most of what a small org or startup site needs: it lets you set a focus keyword for each page and then evaluates how well you’ve optimized for it (checking things like keyword in title, in first paragraph, in alt text of images, etc.). It also flags technical SEO issues like missing alt tags or no meta description. With Yoast, you can generate an XML sitemap for your site which helps Google index your pages. Additionally, Yoast’s readability analysis helps you write in a clear way, which is good for all audiences. Using Yoast can improve your site’s ranking on search engines over time, which means more organic traffic and awareness without spending on ads. For charities with educational content or startups with active blogs, this can translate into more people finding your resources. And better visibility often leads to more support or customers.
How to get it: If you have a WordPress site, install the Yoast SEO plugin (Plugins > Add New > search “Yoast SEO”). Once activated, go through the initial configuration wizard: it asks a few questions about your site (like are you an organization or person, do you want to appear in search with your site name, etc.). After that, when you edit any page or post, you’ll see the Yoast SEO meta box below the editor. Here, set a focus keyword or keyphrase for that page – think about what someone would search to find that content. Yoast will then give you a list of recommendations (with red/orange/green dots) on how to better optimize. Aim for as many green lights as practical, but don’t force it unnaturally. Also fill in the SEO title (usually you keep your page title) and meta description with a concise, compelling summary including your keyword – Yoast provides a handy snippet preview of how it will look on Google. Over time, use Yoast’s analytics (the “SEO” column in your pages list shows a colored dot for SEO status) to ensure most important pages are well-optimized. If you want advanced features like managing redirects or optimizing for multiple keywords, Yoast Premium is a paid upgrade – nonprofits can sometimes get a discount by contacting Yoast, or you can use alternatives like Rank Math (some offer more free features). But for most, Yoast free is a staple to improve search presence.
37. Video Creation Tools (Lumen5, Adobe Spark/Express)
What it does: Lumen5 and Adobe Spark (now called Adobe Creative Cloud Express) are tools that help you create short videos or animated posts easily. Lumen5 can turn blog text into engaging video snippets using AI, and Adobe Express lets you create simple videos, social media graphics, and web pages with minimal effort and templates.
Why it’s great: Video is a powerful medium to capture attention online, but traditional video editing is complex and costly. Lumen5 offers a free tier where you can produce a limited number of videos per month by plugging in your text and images – it will automatically generate scenes with stock footage (they provide a basic library) and add text overlay, which is perfect for repurposing a blog post into a quick Facebook video, for instance. Adobe Express (free for basic use, and premium is included if you have any Creative Cloud plan or for nonprofits via TechSoup) is great for making animated quote graphics, simple promo videos, or slideshows with music. Both are user-friendly for non-editors. You can whip up a fundraising campaign video with photos and captions or a promo for an upcoming event without hiring a videographer. In a social media landscape where video content gets more reach, these tools allow small teams to participate without heavy investment. Additionally, Adobe Express has a bunch of templates for posters, flyers, and social posts, so it doubles as a design tool like a lightweight Canva. Utilizing these can make your content more dynamic and shareable.
How to get it: For Lumen5, sign up on their website for the free plan. They usually allow a few videos (with Lumen5 watermark) per month. Start a new video, and you can either enter a URL of a blog (it will fetch text) or copy-paste some text you want to visualize. Choose a template/style and Lumen5 will auto-generate a storyboard. You can then edit scenes, adjust text length, swap the suggested stock videos/images, and add music from their library. When satisfied, publish the video and download it. For Adobe Creative Cloud Express, if you have an Adobe ID, you can access the free features via express.adobe.com or get the mobile app. TechSoup also offers donated access to Adobe Express Premium for nonprofits (it might come bundled with other Adobe licenses). Use Express’s video maker by selecting a template or starting from scratch – you can combine video clips, images, and text, and there are simple animation options (e.g., fade in text). Export when done. Both tools emphasize ease: don’t be afraid to use the preset themes and music; they’re designed to make an impact. Share your new videos on social platforms or embed on your site to enrich your storytelling and marketing.
Design tools aren’t enough—you need structure.
I support NPOs in setting up templates, brand libraries and workflows across Canva, Adobe, and more. Explore Creative Direction support or book an audit.

Protecting your data and systems is critical, but cybersecurity solutions can be expensive. Fortunately, there are free or donated options to help secure your nonprofit or startup from threats. These tools cover everything from secure email and passwords to network protection – so you can safeguard your IT without a big budget.
38. Cloudflare Project Galileo
What it does: Cloudflare’s Project Galileo provides free enterprise-level website security and performance services (including DDoS attack protection, Web Application Firewall, CDN, and more) to vulnerable public interest websites, such as nonprofits, human rights groups, and journalism sites.
Why it’s great: If your nonprofit’s website might be at risk of cyberattacks or you just want to ensure it stays online and fast, Cloudflare can be a huge help – and under Project Galileo it’s completely free for eligible organizations. This program was started to protect organizations that are doing important work but might lack resources to defend against things like DDoS attacks (which can take a site offline). By using Cloudflare, your site’s traffic is routed through their network, which filters out malicious traffic and speeds up delivery of your content through their global CDN (content delivery network). Even if you’re not under threat, using Cloudflare’s free plan (available to anyone) provides basic DDoS mitigation and free SSL, which is a good start for site security. But Project Galileo gives the highest level of protection and features (the kind big companies pay for) at no cost – for example, advanced firewall rules, bot management, and 24/7 support in case of an attack. For a small NGO, surviving a massive attack could be the difference between continuing your mission or being silenced, so it’s wonderful that Cloudflare extends this shield. Tech startups probably won’t qualify for Galileo unless they’re doing something like journalism, but they can still use Cloudflare’s free or paid plans for performance and security benefits.
How to get it: Apply for Project Galileo via Cloudflare’s website by filling out a short application detailing your organization and why you might be a target (e.g., you publish sensitive information, advocate for certain communities, etc.). They partner with organizations like Access Now and others to review applications, and you’ll typically hear back within a couple of weeks. If approved, they’ll instruct you on setting up Cloudflare – which generally involves changing your domain’s nameservers to Cloudflare’s. This allows Cloudflare to sit in front of your site. You’ll then use the Cloudflare dashboard to configure settings. If not approved, you can still use Cloudflare’s free tier: sign up for an account, add your website, and switch the nameservers. You’ll immediately get benefits like faster page loads and free DNS management. Then, even on the free plan, enable settings like “Always Use HTTPS” and the basic firewall rules. Whether on Galileo or free, Cloudflare will also give you a free SSL certificate to secure your site if you don’t have one. Keep an eye on their email updates; Cloudflare often adds new free security tools (like free CAPTCHA service, etc.) that you can leverage to further protect your organization.
39. Okta for Good (Single Sign-On & Identity)
What it does: Okta is an identity and access management service. It provides secure single sign-on (SSO), multi-factor authentication (MFA), and user directory services so that your team can log in to all your apps with one set of credentials safely.
Why it’s great: Okta helps strengthen your organization’s login security (which is often a weak point for hacks) and simplifies user management. The Okta for Good program donates 50 licenses of Okta Workforce Identity products for free to nonprofits, and then 50% off additional licenses. In practice, that means most small-to-medium nonprofits can cover their staff accounts without paying a cent, getting features like robust SSO – meaning your staff remember one password to access email, file storage, CRM, etc., and you can enforce MFA and security policies centrally. This greatly reduces the risk of password-related breaches and also makes onboarding/offboarding easier (disable one Okta account to revoke access from all integrated apps). Even if you’re using the donated Microsoft 365 or Google Workspace, Okta can sit on top to unify logins to all services (including smaller SaaS tools) and provide an extra security layer. For startups, Okta has a startups program (sometimes via accelerators or the Okta for Startups initiative with certain VC firms) – but even if not, the nonprofit donation shows the level of commitment they have to social impact. By using Okta, you follow security best practices used by large enterprises, which can also be reassuring to donors or customers concerned about data privacy. Another benefit: Okta’s dashboard can increase productivity – people spend less time logging in and resetting passwords. All in all, Okta for Good allows nonprofits to leapfrog into a zero-trust security posture at no cost, which is especially important as we handle more sensitive digital data.
How to get it: Go to Okta for Nonprofits and submit an application for the Nonprofit Technology Initiative. You’ll need to verify your nonprofit status (501(c)(3) or local equivalent). Once approved, Okta will help set up your tenant (your Okta cloud instance). You’ll get up to 50 users on Okta Identity Cloud (which includes SSO, MFA, Universal Directory, and basic lifecycle management) for free, and a 50% discount if you need more than 50. Work with your IT person or Okta’s onboarding team to integrate apps into Okta – they support thousands out-of-the-box (via SAML, OAuth, etc.). Common ones to start with: Office 365, G Suite, Box/Dropbox, Slack, etc. Enable MFA – Okta Verify app is free to use for push notifications, or you can use Google Authenticator codes or SMS. Educate your team that after Okta deployment, they’ll log in through the Okta portal which then gives them one-click access to their apps (and that MFA will sometimes prompt to verify their login). For any new cloud app you adopt, you can check if it supports SSO through Okta and add it, making management simpler. If you’re a startup and interested, Okta has a Startups program offering a couple years free for early-stage companies – you’d apply similarly, showing your details. Strong identity management might not be the first thing on your tech wishlist, but implementing it early (for free via these programs) can save a lot of pain down the road.
40. Bitdefender (Antivirus for Nonprofits)
What it does: Bitdefender is a leading cybersecurity company offering antivirus and anti-malware software to protect computers, servers, and mobile devices from threats. Their products often come as centrally managed solutions for business use (GravityZone).
Why it’s great: Through TechSoup, Bitdefender offers donated security software licenses to nonprofits. For example, the Bitdefender GravityZone Business Security solution (which protects multiple devices with one console) can be requested by eligible NGOs either for free or a nominal admin fee. This provides business-grade antivirus, anti-phishing, ransomware defense, and more. Keeping devices secure is crucial when handling donor data or sensitive program information, and using donated Bitdefender licenses means you don’t have to rely on consumer free antiviruses (or worse, nothing at all) which might not catch the latest threats. Bitdefender consistently scores high in independent threat detection tests, so you’re getting top-notch security. They also have features like device firewall, web filtering (to block malicious websites), and centralized reports – helpful if you have an IT person monitoring overall health. Nonprofits often have older computers or volunteers’ devices connecting to networks; having Bitdefender on all endpoints ensures one infected USB or file doesn’t wreak havoc. For startups, an antivirus is still a must on Windows machines (and recommended on Macs too) – even if you can’t get donated licenses, Bitdefender and others offer small business packages at reasonable cost, or you can use reliable free versions (just be mindful of their limitations). But if you qualify for TechSoup, why not get the professional solution fully donated?
How to get it: Sign up with TechSoup South Africa and check your product catalog. You should find an offer like “Bitdefender GravityZone Business Security – 1 year subscription for X devices (Donation)”. Typically, it might allow something like protection for 5, 10, or 25 devices for one year. Request the quantity you need (keeping in mind to include all your desktops, laptops, and maybe servers if applicable). After completing the request and paying the admin fee if any, you’ll get an email with an activation code or instructions. You’ll need to create a Bitdefender GravityZone account and redeem the code there. From the GravityZone cloud console, you can then generate installers for your devices or send email invites to staff to install the Bitdefender agent. The console lets you see all devices’ status (e.g., device1 is protected and updated, device2 hasn’t checked in, etc.). Set it to update automatically and run periodic full scans (usually default). Ensure all your machines, especially any that handle finances or personal data, have an AV like Bitdefender on them. Mark your calendar for when the 1-year is about to lapse – you can return to TechSoup to request a renewal donation each year (subject to their donation limits). That way you maintain continuous protection for free. Combining this with good practices (like not clicking unknown links, keeping OS and software updated) will greatly reduce your risk of a security incident, which is vital to maintain trust with donors and users.
41. Bitwarden (Password Manager)
What it does: Bitwarden is a secure password manager that helps you store and manage login credentials, notes, and other sensitive info in an encrypted vault, accessible across devices. It’s an open-source alternative to tools like LastPass or 1Password.
Why it’s great: The core Bitwarden product is open-source and offers a fully functional free tier for individuals and even small teams (though team features are limited on free). Using a password manager like Bitwarden allows your staff to generate and use strong, unique passwords for all accounts without having to remember them – reducing the likelihood of breaches due to weak or reused passwords. You can also share passwords safely among team members using Bitwarden’s organization vaults (for example, the login for your social media accounts can be shared with multiple staff without emailing the password around). Bitwarden’s free personal plan already provides unlimited passwords, syncing to unlimited devices, and even 2FA via TOTP code storage. Their Teams and Enterprise plans are very affordable ($3-5 per user/month) and they offer a 50% discount for nonprofits and open source projects on those paid plans (you contact Bitwarden sales for it). Many nonprofits might even get by with using the free “organization” which allows 2 users to share content – useful for a small org’s critical accounts. Unlike some proprietary managers, Bitwarden’s open nature gives transparency into its security model, and it has been audited. Adopting a password manager is one of the highest-impact security upgrades a group can do, essentially eliminating the sticky notes and Excel files of passwords and ensuring everyone uses strong credentials. Bitwarden makes that accessible without cost barriers.
How to get it: Create a free Bitwarden account on their website (you can use the web vault or download the desktop/mobile apps). Encourage each staff member or active volunteer to do the same. Start storing your logins in Bitwarden – the browser extension can capture credentials as you log in and save them, or you can import from another manager if you were using one. Enable two-step login for Bitwarden itself (they support authenticator apps or email 2FA on free plan, and duo/U2F keys on paid). If you need to share passwords between people, you’ll want an “Organization” in Bitwarden. The free organization allows 2 users and 2 collections (collections are like folders of shared logins). This might suffice for a director and manager to share stuff. If you need more, Bitwarden’s Teams plan is $3/user/month – but as a nonprofit, contact Bitwarden for the 50% off; they usually will provide a coupon or invoice with discount. Once your organization is set up, you can invite users by email. Then move passwords that multiple people need into shared collections within that org. From then on, when someone updates a password, everyone else with access gets the update – no more emailing “what’s the new password?”. Take time to educate everyone: use Bitwarden’s generator to create random passwords, avoid reusing passwords, and keep an eye on Bitwarden’s reports (like the vault health report which flags weak or reused passwords). Bitwarden can also store other sensitive info like bank PINs or private keys in secure notes. By integrating this into daily workflow (install the extension on everyone’s browser and mobile), you’ll significantly raise the security baseline of your org at virtually no cost.
42. Let’s Encrypt (Free SSL Certificates)
What it does: Let’s Encrypt is a nonprofit certificate authority that provides free SSL/TLS certificates for websites. These certificates enable HTTPS, ensuring data between your site and its visitors is encrypted.
Why it’s great: No one should run a website without HTTPS today – browsers even mark non-HTTPS sites as “Not Secure”. Let’s Encrypt makes it free and relatively easy to secure your website with a trusted certificate. This not only protects your users (especially if you have donation forms or login pages) but also can improve your search ranking (Google favors HTTPS). Let’s Encrypt certificates are 100% free and automatically renewable (they last 90 days, and you set up a process to renew them). This is a game-changer for personal projects, nonprofits, startups – essentially anyone – because it removed the cost barrier of obtaining certificates which used to be $50+/year per site. Now you can have as many certificates as needed (including wildcards for subdomains) at zero cost. For nonprofits handling donations, using HTTPS is also often a compliance requirement by payment processors. Beyond encryption, having the padlock icon and “https://” can increase visitor trust as well. Let’s Encrypt is run by the Internet Security Research Group and is a well-respected authority trusted by all major browsers. Even many hosting companies integrate it in their control panels to make adding SSL one-click. In short, Let’s Encrypt has helped drive the web toward 100% encryption, and your organization can benefit from that altruism – it’s arguably one of the biggest security wins for the nonprofit/academic/open web community in the last decade.
How to get it: If your website is managed by a host, first check if they offer Let’s Encrypt support directly. Many do – for instance, cPanel has an “AutoSSL” feature that often uses Let’s Encrypt, Plesk has a Let’s Encrypt extension, and hosts like WP Engine or Bluehost might have a setting to “Add Let’s Encrypt certificate” for your domain. If so, use that – it will handle the issuance and auto-renewal for you. If you manage your own server or use a VPS, you can use the Certbot tool (from EFF) to obtain and renew certificates. Visit certbot.eff.org and it will give you instructions tailored to your server’s OS and web server (Apache, Nginx, etc.). Typically it’s a few shell commands: install certbot, then run something like certbot --apache -d yourdomain.org -d www.yourdomain.org which will fetch the cert and configure Apache. Certbot also sets up a cron job to renew automatically. If you have a more unusual setup or need a manual option, Let’s Encrypt also supports DNS-01 challenge which can work for issuing wildcard certs by adding a DNS record. The main thing is, after you install the cert, test your site by visiting https:// and ensure everything loads via HTTPS (no mixed content warnings). It’s also a good idea to configure a redirect from HTTP to HTTPS site-wide (Certbot can do this for Apache/Nginx automatically). Once done, your site is secure, visitors see the padlock, and you’ll never have to pay for certificate renewals. Just keep an eye that certbot renewals succeed (most will email you if the cert is nearing expiry and hasn’t been renewed, which is your cue to troubleshoot). Enjoy the benefits of a secure site courtesy of Let’s Encrypt and its sponsors!
43. ProtonMail (Secure Email)
What it does: ProtonMail is a secure email service based in Switzerland, offering end-to-end encryption for emails and a strong privacy stance. Proton also provides services like ProtonVPN, ProtonDrive, and ProtonCalendar, all with a focus on security and privacy.
Why it’s great: If your nonprofit handles sensitive communications (e.g., human rights work, legal aid, health data) or you’re just privacy-conscious, ProtonMail ensures that the content of your emails can be read only by you and the intended recipient. Even ProtonMail’s own servers store your emails in encrypted form such that they can’t read them. They have a free plan (with some limits: 1 GB storage, 150 messages/day, 3 folders/labels) which might be enough for personal use or a role account. They also offer discounted pricing for nonprofits on their paid plans – you need to contact Proton’s sales for that. With ProtonMail, you can use a custom domain (on paid plans) so your address is still yourname@yourorg.org but going through Proton’s secure infrastructure. This could be valuable if, say, you want all board emails to be secure or your staff in the field to have protected communications. ProtonMail also has useful features like self-destructing emails and password-protected emails to outside recipients (they get a link to decrypt in browser). On top of mail, Proton’s bundle could cover your VPN needs (ProtonVPN has a free tier with limited servers but no data cap – great for secure browsing especially on public Wi-Fi) and cloud storage (ProtonDrive, to store files encrypted). Using these tools can help a nonprofit safeguard donor information, confidential reports, or whistleblower communications. For startups, if you’re handling intellectual property or just prefer not to be on Google for email, Proton is a solid alternative with a modern web and mobile interface, and fairly reasonable pricing for the security benefits. At the very least, having a few ProtonMail accounts for your most sensitive roles (executive director, etc.) could be part of a robust security plan.
How to get it: You can start with Proton’s free tier by signing up at proton.me for a ProtonMail account (which will be something like username@proton.me or @protonmail.com). For custom domain or multi-user support, you’d need a paid plan (ProtonMail for Business). To get nonprofit pricing, you should reach out to Proton’s support or sales – they typically ask for proof like a charity registration or 501(c)(3) letter and then might offer something like 20-50% off plans. Once set up, you can either use ProtonMail via their web interface, mobile apps, or even configure a Proton Bridge app which lets you use ProtonMail with traditional email clients (this bridge is available to paid users). Start using it by migrating some email communications there – note that end-to-end encryption works automatically between ProtonMail users. To encrypt emails to non-Proton recipients, you use the “Encrypt for Outside” feature which allows you to set a password that you share via another channel; the recipient will get a link to view the message securely. Internally, decide which communications should go through ProtonMail versus regular email. You might reserve it for the most sensitive discussions to keep things simple. Train staff on the slight differences (like using the Encrypt option for outside recipients and handling keys). Proton’s other tools: ProtonVPN can be installed on work devices (the free version is good, paid is better for more countries/speed – Proton has given nonprofits free VPN in some cases, worth asking). ProtonDrive is still newer but could be an option for secure file sharing with partners (paid plans include some storage). By integrating Proton services where appropriate, you strengthen your overall security posture, demonstrating to stakeholders that you take privacy seriously.
44. 2-Factor Authentication Apps (Authy, Google Authenticator)
What it does: Two-factor authentication (2FA) apps generate time-based one-time passcodes (TOTP) that you use as a second step when logging into accounts (after your password). Authy, Google Authenticator, Microsoft Authenticator, and others serve this purpose. When 2FA is enabled on an account, you typically need the current 6-digit code from one of these apps in addition to your password to login, which significantly enhances security.
Why it’s great: Enabling 2FA on your accounts is one of the simplest and most effective security measures. These authenticator apps are free and can handle tokens for multiple services (Google, Microsoft, Facebook, Dropbox, Slack, etc. all support authenticator-based 2FA). Using an app like Authy or Google Authenticator provides an extra layer of protection because even if someone steals or guesses your password, they still cannot get into your account without the one-time code from your phone (or a hardware security key, but that’s another category). For nonprofits, this is crucial especially for email, banking, and social media accounts, which are juicy targets for takeover – 2FA can stop the vast majority of automated or bulk hacking attempts. It’s also important for any account that has access to personal data or could be used to impersonate your org. Authy has an advantage that it backs up your 2FA accounts in encrypted form to the cloud and allows multi-device sync (so you don’t lose your tokens if your phone is lost, and you can have them on, say, phone and tablet). Google Authenticator is more bare-bones (recently added an optional Google Drive cloud sync). Microsoft’s Authenticator also works similarly and has backup. All are free; it often comes down to preference. Many of our stakeholders might already be using one for personal accounts, so encouraging them to also use for work accounts is easier now. By adopting 2FA apps, you dramatically reduce the risk of phishing or brute-force attacks leading to a breach, because the attacker would need that physical device too. It’s an essential part of cyber hygiene for both small and large organizations.
How to get it: First, decide on an app: Authy is a good recommendation for non-technical folks due to its backups and multi-device (just ensure they set a strong Authy backup password). Google Authenticator or Microsoft Authenticator are fine too; if some staff already use one, letting them continue might be simplest. Download the app, Google Authenticator on Play Store/Apple Store, or Microsoft Authenticator on your smartphone. Next, enable 2FA on key accounts. Typically, in account settings under Security or Login, look for “Two-Step Verification” or “Two-Factor Authentication”. They will often give you options like SMS, email, or authenticator app. Choose authenticator app (sometimes called “Time-based OTP”). The site will show a QR code. Open the Authy/GA/MS app, add a new account (in Authy, hit +, in GA tap the plus, etc.), and scan the QR code. It will then show a 6-digit code that changes every 30 seconds. Enter that code on the website to verify setup, and you’re done. Make sure to save any backup codes the site provides (in case you lose your device). Repeat this for all critical services: email accounts, your website CMS, social media profiles, cloud storage, CRM, banking portals (some banks use SMS OTP – if they support authenticator app via something like VIP Access or so, use that), etc. Encourage each team member to secure their accounts similarly (especially those with administrative privileges). For convenience, Authy and MS Authenticator allow adding multiple devices (Authy via login, MS via cloud backup and then recover on new device logged into same account). Google Auth doesn’t, except via manual transfer. So have a plan that if someone loses their phone, you can recover (backup codes kept in a safe place, etc.). Some services support “Authenticator apps” but also phone prompts or hardware keys (e.g., Google accounts can do Google Prompt on phone or Titan Security Keys). Those are great too, but using the standard TOTP apps is a universally available method that’s a vast improvement over password-only. Once 2FA is widely adopted in your org, you’ll have significantly mitigated one of the biggest risks (credential theft). And the cost is nothing but a few minutes of setup and habit change.
45. Cybersecurity Awareness Training Kits
What it does: These are free or low-cost resources (often provided by organizations like KnowBe4, SANS, national cybersecurity centers, etc.) that help train your staff and volunteers on cybersecurity best practices – through videos, quizzes, or presentation kits. The idea is to raise awareness of common threats like phishing, social engineering, and unsafe behaviors.
Why it’s great: Human error is often the weakest link in security. Phishing emails, weak passwords, and unsafe browsing can lead to incidents even if you have the best tech protection. By educating your team with free training materials, you can create a culture of vigilance and good habits without hiring expensive trainers. For example, KnowBe4 offers a free Cybersecurity Awareness Month kit each October which includes posters, tip sheets, and a training module you can send out. The National Institute of Standards and Technology (NIST) and many government cyber agencies also release guides and posters public domain. In South Africa, one could reference materials from the SafetyHub or international resources, since threats are global (just contextualize if needed). Even a simple yearly workshop or sending a “security tip of the month” email using these materials can reduce the chance of someone falling for a scam. Many trainings use engaging animations or real-life examples which can stick better than a policy document. Some are interactive – like quiz games – which can be fun as a team activity (maybe with a prize for the highest score). Additionally, involving everyone in security (not just IT staff) means more eyes to detect and report suspicious things. This can prevent incidents or at least catch them early (e.g., someone reports “I got a weird email asking for our donor list, is this legit?” – that’s a win, because they noticed and asked). Considering nonprofits and startups may not have dedicated security officers, empowering each member through knowledge is key. And since many great resources are open, you don’t need a budget line for this, just a bit of time.
How to get it: One approach is to designate October (Cybersecurity Awareness Month) as a time to do a focused training. KnowBe4’s free kit (available on their website each year) has a training video (last year it was a comic-style “Common Threats” video), some digital posters, and a quiz. You can use those as-is – maybe email out the video link and then the quiz via Google Forms or something, and put up the posters in the office (or on your internal Slack/Workplace). Throughout the year, you can also subscribe to blogs like SANS OUCH! – they release a free monthly security newsletter aimed at general computer users (topics like “Secure Wi-Fi Use” or “Vishing Attacks”) in multiple languages. Share those in internal communications or pin them on a bulletin board. The Cybersecurity & Infrastructure Security Agency (CISA) in the US has a repository of tip sheets and toolkits (e.g., phishing, ransomware – they’re generic enough to apply anywhere). Use those to run a lunch-and-learn session. Perhaps once a quarter, pick a topic and talk about it for 15 minutes in a staff meeting – use slides from a free toolkit to guide you. Interactive ideas: run a phishing drill using a free tool (KnowBe4 has a limited free phishing test, or PhishSim by InfoSec Institute offers a trial) to see who clicks on a fake phishing email – then train them. Also, ensure leadership is on board to reinforce these practices (like, everyone knows the Director supports the idea of “Stop and Think Before Clicking”). If you have the capacity, you can even enroll staff in free online courses: for instance, NonprofitReady might have a basic security awareness course, or IBM’s Security Learning Academy has free modules for “cybersecurity fundamentals” that could be relevant. By consistently using these free educational resources, you create a human firewall to complement your technical defenses. And that can make all the difference in preventing a costly breach or downtime incident that could disrupt your mission.
Don’t wait for a breach to get organised.
I help small teams implement secure backups, password policies, and access controls—without needing IT staff. Let’s fix your digital hygiene.
Managing your contacts, donors, and day-to-day work is essential for growth. These CRM (Customer/Constituent Relationship Management) and productivity tools help you keep track of relationships, streamline office tasks, and work smarter – all with free plans or nonprofit-friendly pricing.
46. Salesforce Nonprofit Success Pack
What it does: Salesforce is a powerful CRM platform widely used in the business world. For nonprofits, Salesforce offers the Nonprofit Success Pack (NPSP), which is a set of templates and configurations on Salesforce to manage donors, donations, programs, and volunteers – essentially tailored CRM components for charities.
Why it’s great: Through Salesforce’s Power of Us program, eligible nonprofits receive 10 Salesforce user licenses for free. This is an incredibly valuable donation, as Salesforce is a top-tier CRM and these licenses could cost thousands otherwise. With NPSP, you can track fundraising campaigns, donor history, grant applications, program delivery metrics, and more in one system. It’s highly customizable – you can add fields or modules as needed – so it can grow with you (small orgs might start with basic donation tracking, larger ones might manage complex case workflows or partner relationships). Salesforce also has a huge ecosystem of third-party apps (many discounted for nonprofits too) and a community of pro bono “Salesforce Heroes” willing to help nonprofits implement the system. While Salesforce has a learning curve, they provide the Trailhead learning platform with free modules, and their nonprofit community (The Hub) where you can get support from peers. Many nonprofits find that once set up, Salesforce becomes the central “source of truth” for all their interactions and data – which improves reporting (like instant dashboards of donations this month vs last, or donor retention rates) and efficiency (no more piecing together spreadsheets from different departments). It’s enterprise-grade infrastructure on a charity budget. For startups, Salesforce also has startup deals through accelerators or their Essentials plan for small business which is low-cost; but many startups might opt for other CRMs initially. Nonprofits, though, rarely get an opportunity for software this powerful for free. It can truly turbocharge your fundraising and program management if you invest the time to use it effectively.
How to get it: Go to Salesforce.org Power of Us and apply for the nonprofit donation. You’ll need to verify your charitable status (usually via TechSoup or similar). Once approved, Salesforce will issue you 10 Enterprise Edition licenses with the Nonprofit Success Pack (NPSP). It’s recommended to find a Salesforce implementation partner or follow a self-help guide to get started: Salesforce has a NPSP Getting Started workbook, and there are local user groups often. Begin by migrating your existing donor data into Salesforce accounts/contacts and opportunities (donations). You might use the NPSP Data Import tool if coming from Excel/CSV. Set up your key processes: e.g., enter new donations, generate thank-you letters (Salesforce can integrate with document generation apps or just store templates). Also set up basic reports: total donations by month, top donors, etc. If you manage programs, use Cases or a custom object to track beneficiary data or service delivery, so everything’s connected (you can see a donor who volunteers and attends events, all in one profile, for instance). Leverage Salesforce’s Nonprofit Success Pack features like Household accounts (to link family members) and recurring donations management. The learning curve can be steep, but start small – maybe focus on fundraising use case first (donor management and donation tracking). Salesforce offers 1-on-1 office hours and a lot of documentation. Additionally, check out the Salesforce Appexchange for nonprofit-focused add-ons – many are free or discounted (like a volunteer management app, or an accounting connector). Over time, as you become comfortable, you can automate tasks (like trigger an email to fundraising manager when a large donation is entered, or an alert when a donation pledge is overdue) using Salesforce’s Process Builder or Flow. The important part is to keep data clean and get user buy-in (ensure everyone records their interactions in Salesforce). With 10 free seats, you might have plenty for all staff to use it daily. And if you need more, Salesforce offers deep discounts beyond those 10 (like any additional licenses at 75% off or so). This scalability means your CRM will not be the limiting factor in your growth; you can dream big with it.
47. HubSpot CRM
What it does: HubSpot CRM is a popular customer relationship management system that tracks your contacts and interactions with them. HubSpot also provides marketing, sales, and service hubs (some free features, some paid) that integrate with the CRM, covering things like email marketing, lead forms, live chat, and ticketing.
Why it’s great: The base HubSpot CRM is 100% free, forever for unlimited users and up to 1 million contacts. For a startup or small nonprofit, that means you can manage your contacts (donors, clients, partners, media, etc.) and your deal or donation pipeline in one place at no cost. The interface is extremely user-friendly – often a selling point versus more complex CRMs. You can log emails (HubSpot plugs into Gmail/Outlook), schedule follow-up tasks, and see a timeline of each contact’s interactions. On the marketing side, HubSpot’s free tools let you create email newsletters (up to a certain send limit), capture leads via forms/pop-ups on your website, and even build a basic landing page or website if you need. For nonprofits, you could use HubSpot to track fundraising leads (e.g., you might call prospective donors and log notes, moving them from “Prospect” to “Approached” to “Donated”), and also manage relationships with volunteers or beneficiaries. The free ticketing system could track support cases if you have a helpline or similar. If you outgrow the free features, HubSpot offers a 40% discount for nonprofits on their paid plans (you apply through their nonprofit program). Similarly, HubSpot has a for Startups program (typically via venture investors or incubators) that can give 30-90% off in the first year or two of paid hubs. But many small organizations find the free CRM plus free features in Marketing Hub (like basic email for 2,000 emails/month) are plenty to start with. Also, HubSpot’s strength is being all-in-one if you do choose to invest in their ecosystem – eliminating need for separate email software, form builders, etc. For an organization without a dedicated IT person, HubSpot’s cloud nature and ease of use can be very attractive.
How to get it: Sign up for a free HubSpot CRM account. During setup, indicate your context (nonprofit, etc.) so HubSpot can tailor some suggestions. Begin by importing any existing contacts (HubSpot’s import tool can take CSVs). You can customize contact properties (fields) to hold important info (like “Donor Level” or “Volunteer Interests”). Set up the Sales pipeline if relevant: by default it has Deal stages like Appointment Scheduled, Qualified, etc., which you might repurpose for your needs (e.g., Prospect, Contacted, Proposal Sent, Committed). Add your team users (free, unlimited) and set their permissions appropriately. If using email integration, connect your email account so sent emails log automatically on contact timelines. Explore the Marketing tab – you can create an email list and send a newsletter directly from HubSpot (just mind the branding or footer on free version). The Forms feature can create embeddable forms that feed into HubSpot (great for newsletter signups or contact us forms). Over time, try out the Conversations inbox which can integrate a live chat on your website or collect messages from a form to a team inbox in HubSpot – a nice free customer service addition. If you find yourself needing more advanced things (like automated email sequences or more granular analytics), that might mean considering a paid upgrade. At that point, as a nonprofit, look at HubSpot’s nonprofit discount page; you usually fill a form with your 501(c)(3) info to get a coupon code. For startups, if you have funding or are in an accelerator, ask if they have HubSpot for Startups partnership – that can be huge savings (90% off first year, 50% off second year on certain plans). But even without paid add-ons, the free CRM itself with contact and deal management is enormously helpful to break free of spreadsheet tracking and ensure everyone on your team has the context for relationships and tasks.
48. CiviCRM
What it does: CiviCRM is a free, open-source CRM software designed specifically for nonprofits, NGOs, and civic sector organizations. It can manage contacts, donations, memberships, event registrations, mass mailings, and even case workflows – all built to support nonprofit needs (hence “Civi”). It often integrates with CMSes like WordPress, Drupal, or Joomla, allowing you to run your database and website in tandem.
Why it’s great: CiviCRM is free (no licenses) and fairly comprehensive out-of-the-box for nonprofit workflows. That means even small organizations can afford a fairly advanced CRM without a budget. It’s also highly customizable and supported by a community of developers and implementers worldwide. CiviCRM shines in scenarios like: you want a single system to track donors (with donation history and receipts), manage membership subscriptions (like a friends-of-the-org program with renewals), register people for events and track attendance, send out bulk emails, and manage cases or activities (e.g., a human services org managing client interactions). It’s not as slick an interface as Salesforce or HubSpot and usually requires some initial configuration and training, but it’s truly yours – data stays on your server if you self-host, and you can extend it with extensions or custom code. Many mid-sized nonprofits use CiviCRM as an alternative to paid CRMs, especially if they value open-source or need the flexibility to integrate deeply with their website (for example, having a donation page on WordPress that feeds into CiviCRM, updating the donor record and sending an automated tax receipt). The community aspect means improvements and security fixes are constantly contributed. While CiviCRM’s core is free, you might spend resources on a consultant to help set it up optimally unless you have tech-savvy staff – but there’s also a lot of documentation and even CiviCRM-focused forums where you can get help for free. If you have more time than money and your needs align with what CiviCRM offers, it can be a brilliant solution with no ongoing fees. Furthermore, no vendor lock-in; you can move your CiviCRM database anywhere or modify it as you see fit. Startups likely won’t gravitate to CiviCRM (it’s more nonprofit tailored), but any membership-based or advocacy startup group could consider it to manage their community interactions.
How to get it: To use CiviCRM, you’ll need to either install it on a web server or use a hosting provider that offers CiviCRM (some specialist providers exist, often run by community members, offering hosting and support packages). If you have a WordPress site, you can install CiviCRM as a plugin (it’s a big plugin though, and may require VPS-level hosting rather than cheap shared hosting to run smoothly). Similarly for Drupal or Joomla – there are installation kits. Visit CiviCRM’s download page for the latest version and instructions specific to your CMS. After installation, configure your basic settings: organizational info, financial accounts for tracking funds, user permissions, etc. Then import your existing contacts and donations (CiviCRM has import tools for contacts, contributions, memberships, etc. via CSV). The learning curve is there: familiarize yourself with the concepts (contacts can be individuals or organizations, relationships link them, activities log interactions, contributions are donations or payments, cases are for tracking service delivery with timelines, etc.). Make use of CiviCRM’s extensive documentation (docs.civicrm.org) and the StackExchange-style Q&A site (civicrm.stackexchange.com) if you hit questions. You might also find a local CiviCRM user group or Slack channel to join. As you start using it, you can enable components you need (maybe you don’t need memberships, so leave that off, but need events, so use that). You can create profiles which are web forms that expose CiviCRM fields – to embed on your site for newsletter sign-ups or event registrations. Because CiviCRM is integrated with your CMS, you can have, say, a WordPress page that is an event sign-up form and it will auto-create a contact and register them in CiviCRM’s event module. That’s powerful – it unifies online interactions with your database seamlessly. Be ready to invest some time in setup and testing, but once it runs, you own a robust CRM system free of license costs. Keep up with updates (CiviCRM issues security releases; applying them is important, just like you would update WordPress). The community often announces new features or extensions (like one for SMS integration or advanced reporting). Adopting CiviCRM is a bit like getting a pet – free to adopt but needs care and feeding – but it will serve you loyally and can grow with your organization’s needs in a way that few other free solutions can.
49. Zoho Suite (Zoho CRM & Apps)
What it does: Zoho offers a suite of cloud-based business applications, including Zoho CRM (for managing contacts and deals), Zoho Books (accounting), Zoho Projects, Zoho Desk (ticketing), Zoho Mail, and many more – essentially an entire ecosystem from one provider. Zoho CRM specifically is a sales and contact management platform similar to Salesforce or HubSpot in purpose.
Why it’s great: Zoho’s approach is to provide affordable tools that integrate well together. Zoho CRM has a free tier (for 3 users) which might be enough for a small team to track contacts and interactions. Even their paid plans tend to be cheaper than big-name competitors. For nonprofits, Zoho does not have a formal public donation program, but they do consider discounts if you reach out (and certain country distributors of Zoho might have NGO deals). For example, Zoho has been known to donate or heavily discount Zoho Workplace (their equivalent of Google Workspace with Mail/Docs) for educational institutions and sometimes NGOs on a case-by-case basis. Zoho CRM’s free edition includes basic lead and contact management, tasks, and some automation – which might be enough for volunteer tracking or simple donor pipelines. Meanwhile, startups on a budget can run a lot on Zoho’s free or low-cost offerings: you could use Zoho Invoice (free for invoicing), Zoho Meeting (cheaper video calls), Zoho Mail (if you prefer not to use G Suite or Office365), etc., all under one umbrella and one login. The integration piece is key: if you use multiple Zoho apps, they natively talk to each other (e.g., CRM can pull data from Books to see a customer’s outstanding invoices). Plus, Zoho has a no-code integration tool (Flow) and supports API connectivity. One notable part: Zoho also offers an all-you-can-use bundle called Zoho One – for a flat per-employee price, you get almost everything. They have given Zoho One for free or at big discount to some nonprofits in the past (likely through partnership programs). Using Zoho can simplify your IT stack as you grow – instead of needing separate vendors for CRM, email, helpdesk, etc., you might toggle on the next Zoho app. Privacy-minded folks also sometimes prefer Zoho as an alternative to Google/Microsoft because Zoho has a pretty good privacy record and is based in India/U.S. with data centers in many regions (check compliance with local data laws if needed). Overall, Zoho is great for those who want a cohesive suite that’s budget-friendly and don’t mind sometimes the trade-off that it might not be the absolute top-of-class in every module (though some Zoho apps are really good!).
How to get it: Explore the Zoho website and identify which apps meet your needs. For CRM, sign up for Zoho CRM Free which will let 3 users in. Set up your basic pipeline and import contacts if you have them. If you need more users or features, they have Standard/Professional editions – before buying, email their sales and explain your nonprofit status to request a discount; results vary but it’s worth a shot. For Zoho Mail (ad-free email hosting on your domain), they have a free tier for up to 5 users with 5GB each, which could suffice for a small org. Register your domain on Zoho Mail’s site and follow setup instructions (updating MX records). For productivity, Zoho offers Writer (docs), Sheet, Show (presentations) which are free to use online, and part of Zoho’s Workplace bundle. If you want Zoho One (the whole suite), try their free trial and then inquire for nonprofit pricing – sometimes local Zoho partners can facilitate a deal. Once you have the apps, integrate where beneficial: e.g., if using Zoho CRM and Zoho Campaigns (for email newsletters), sync the contacts so you can segment donors vs volunteers in CRM and send targeted emails via Campaigns. Or if you use Zoho Books for accounting, integrate it with CRM to see donation transactions reflected. Zoho’s support forums and documentation are quite extensive, and there’s a user community (also, lots of independent Zoho consultants if you ever need custom help). One caution is not to over-complicate – Zoho has so much that you might turn on more than you can manage. Start with one or two apps, get comfortable, then expand as needed. With patience, you can essentially run an entire organization on Zoho’s stack, at a fraction of typical software costs – and often with free editions until you scale up.
50. Google Workspace & Microsoft 365 (Productivity Suites)
What it does: These suites provide the everyday tools for writing, spreadsheets, presentations, email, and collaboration. Google Workspace includes Gmail, Drive, Docs, Sheets, Slides, Calendar, Meet, etc. Microsoft 365 includes Outlook, Word, Excel, PowerPoint, Teams, OneDrive, and more. They are the backbone for communication and productivity in most organizations.
Why it’s great: We’ve touched on these in Communication & Collaboration, but focusing on productivity: Google Workspace for Nonprofits is free for the basic edition (equivalent to Business Starter), and Microsoft 365 Business Basic is free for up to 300 users for nonprofits. This means your organization can have professional email addresses and use industry-standard productivity tools without the usual subscription costs. For day-to-day work, it doesn’t get more fundamental than being able to create documents, crunch numbers, and share info. With Google Workspace, multiple people can edit a doc or sheet at once, which is fantastic for collaborative projects like grant writing or joint budgets – all changes save in real-time and in the cloud, so no more email attachments flying around. Microsoft 365’s desktop apps are still the gold standard for advanced features and many people are more comfortable with them; and with the nonprofit grant of Business Basic, you also get the web versions and OneDrive (plus Teams for chat/meetings). Even if Business Standard (with desktop apps) isn’t free, nonprofits get it heavily discounted via TechSoup – meaning you could have full Office for, say, $3/user/month or even donated in some cases for a small number of users. Essentially, these big companies have removed cost excuses for nonprofits to be running outdated software – you can always have the latest and securely patched tools now. For startups, while not free, both Google and Microsoft have very cheap plans for small teams (and sometimes free credits via startup programs). Having these suites means you can interface with outside partners seamlessly (no issues opening file formats or scheduling across calendars) and maintain a professional image (your email domain, not a generic account). And from a productivity viewpoint, the ability to store files in the cloud (Google Drive/OneDrive) and access them anywhere is a boon, especially for remote or on-the-go work. Automation features like Google AppScripts or Microsoft Power Automate can streamline some processes later on too. Overall, it’s hard to imagine operating without one of these suites, and with the nonprofit offers, you don’t have to.
How to get it: For Google Workspace: as mentioned earlier, apply via Google for Nonprofits to get the free Google Workspace for Nonprofits offer. Once granted, you’ll set up your domain’s MX records to work with Gmail and create user accounts for your team. You manage it in the Google Admin console. Immediately you get 30GB cloud storage per user (more if you pay to upgrade), and access to the familiar Google apps. For Microsoft 365: sign up at the Microsoft Nonprofits portal and once validated, you can request the Business Basic donated licenses (up to 300). You’ll add your domain in the Microsoft 365 admin center, verify it, then switch your users’ email to Outlook online. Users can then use the online versions of Office apps, or download the mobile apps. If you need the full desktop Office, Microsoft offers donated or heavily discounted licenses for E1/E3 plans or the standalone Office suite through TechSoup. Decide whether your org will primarily use Google or MS as your ecosystem – some mix, but it can get confusing if not planned (e.g., you might use Gmail but still everyone uses Word instead of Google Docs, which is fine but have a storage plan). Train the team on new features like real-time co-editing if they haven’t used it. Import old emails and files if you’re migrating from another system (both Google and MS have migration tools to bring data from prior services or local storage). Enable good practices: for Google, ensure Drive files have proper sharing settings (many mistakenly share things publicly; teach using shared drives or permissions). For Microsoft, ensure everyone installs OneDrive and chooses known folders (Desktop/Documents) to backup – preventing data loss. Avail yourself of freebies within these suites: Google’s add-ons for mail merge or Microsoft’s PowerApps for simple apps – those can boost productivity further. And take advantage of support: Google offers standard support to nonprofits and Microsoft’s nonprofit community can help with questions (as can TechSoup forums). These productivity suites are a solved problem of modern IT – by leveraging the donations, you free up time and money to focus on mission-specific tech or projects.
51. LibreOffice
What it does: LibreOffice is a free, open-source office suite that includes a word processor (Writer), spreadsheet program (Calc), presentation software (Impress), drawing tool (Draw), database (Base), and formula editor (Math). It’s a community-driven fork of OpenOffice and is compatible with Microsoft Office file formats.
Why it’s great: LibreOffice is completely free to use and install on as many computers as you want. If your team cannot afford Microsoft Office licenses and you prefer not to use cloud-based solutions, LibreOffice provides a robust set of tools that cover most office document needs. It’s especially handy for nonprofits that have received donated hardware or use older machines – you don’t want to run pirated software, and you might not have reliable internet all the time for Google Docs, so LibreOffice fills that gap legally and at no cost. It’s also very lightweight in terms of system requirements, so it runs well on older PCs. For common tasks – writing letters, doing budgets, creating basic slideshows – LibreOffice is more than sufficient. The interface is a bit different from MS Office (though it has an optional ribbon-like UI now too), but once learned, it’s straightforward. It even has some features that might surprise you (like a built-in PDF editor through Draw for simple modifications). Moreover, since it uses standard formats (OpenDocument Format, ODF) and can open/save Office formats (DOCX, XLSX, etc.), you can exchange files with others without much trouble. For startups on a shoestring, if you don’t want recurring costs, using LibreOffice and perhaps coupling with something like Thunderbird for email can create an entirely free local productivity environment. The other advantage is offline access – as much as cloud tools are great, sometimes you just need to work without internet, and LibreOffice is always ready. Many organizations keep it as a fallback even if they primarily use other suites. By using LibreOffice, you also benefit from the ethos of open source – no vendor lock-in, and a community that contributes to improvements because they care (e.g., localizing the software to many languages or adding accessibility features).
How to get it: Download LibreOffice from the official site (it’s around a 300MB installer for the full suite). It runs on Windows, Mac, and Linux. During install you can choose typical or custom setup (typical should be fine for most). Once installed, familiarize yourself with the core applications: Writer for documents (it will feel akin to Word), Calc for spreadsheets (Excel-like with nearly all equivalent functions), Impress for presentations (a bit simpler than PowerPoint but can run PPTs fine). If you have existing Office files, LibreOffice will usually open them (complex formatting or VBA macros might not always translate perfectly, so test any mission-critical docs). Set LibreOffice to save by default in Microsoft formats if you constantly exchange files with external parties who use Office – this is an option in the settings (to avoid having to remember to “Save As Word” each time). Encourage staff to try it out on routine tasks; maybe have a cheat sheet of differences (like how Track Changes works in Writer vs Word, etc., which the LibreOffice documentation covers). One important thing: keep it updated. LibreOffice releases minor updates and bug fixes regularly, and occasionally major version upgrades with new features. Since it’s free, there’s no downside to always running the latest version. You can even set it to auto-check for updates. Another tip: if you have extremely old computers where even LibreOffice feels slow, consider older versions or alternative lightweight editors, but generally LibreOffice is optimized well. If your team is hesitant because it’s new, perhaps only roll it out on certain computers or as a trial. Often, cost reality wins them over – when they realize it does 95% of what Office does and you saved hundreds of dollars, they see the value. Also, for any power users of Excel: LibreOffice’s Calc covers most functions and pivot tables, but really elaborate Excel files with macros may not work fully. Identify if that’s a concern; if only one person needs advanced Excel, you can combine approach (most use LibreOffice, one uses Excel). In summary, adopting LibreOffice can liberate your budget for other needs without sacrificing capability in day-to-day operations.
52. Evernote / OneNote
What it does: Evernote and OneNote are note-taking and information-organizing applications. They allow users to capture notes (text, images, audio, web clippings) and organize them into notebooks. Evernote is a standalone, cross-platform service (freemium model), while OneNote is part of Microsoft’s ecosystem (free as part of OneDrive/Outlook or within Office). Both sync across devices so your notes are accessible anywhere.
Why it’s great: These tools help individuals and teams accumulate knowledge and ideas in a structured way rather than having scraps of paper or scattered docs. For instance, a nonprofit leader can maintain an Evernote notebook for board meeting notes, another for grant application research, another for interview transcripts – all easily searchable and tagged. OneNote similarly can hold sections for different projects with pages inside. The appeal is having a “second brain” where you dump information and can retrieve it quickly later. Evernote’s free plan allows use on up to 2 devices with a monthly upload limit (decent for text notes, limiting for heavy media), and it has powerful search (including within PDFs/images) which is great for going paperless – you can snap photos of receipts or business cards and later find them by content. OneNote is completely free and can sync through a free OneDrive account (or your Office 365 account); it integrates well if you’re already using Word/Outlook (you can pull meeting details into OneNote or send notes via email easily). For collaboration, OneNote allows multiple people to edit a shared notebook at once (like a wiki of notes). Evernote has a business version for teams with more collaborative features (and discounts for nonprofits at times). Some use cases: your volunteer coordinator keeps a OneNote with all volunteer role descriptions and training notes; staff can add their tips or updates so it becomes a living handbook. Or your startup team shares an Evernote notebook where each member logs their weekly learnings or user feedback snippets – creating an evolving knowledge base. These apps also have mobile versions that make it easy to capture ideas on the fly (record a quick audio note after a meeting, save a webpage for later reading, etc.). The bottom line is they improve personal and team productivity by making knowledge capture easy and retrieval even easier (no more “where did I jot that down?”). And by using the free versions, you avoid subscription costs that some knowledge management tools have.
How to get it: For Evernote, sign up on their website for a free account. Install it on your main devices (e.g., work computer and phone – remember free is limited to 2 devices). Start by creating a few notebooks for broad topics (e.g., “Meetings”, “Fundraising Research”, “To-Do Lists”, etc.). Then create notes within – each note can be a running document. Use tags if you want cross-categorization (e.g., tag some notes as “2025 Strategy” even if they live in different notebooks). Try the Web Clipper browser extension – it’s a great way to save articles or references; it puts them into Evernote with one click. Make it habit: instead of scribbling in random docs or notepads, open Evernote and write there, since it’ll be saved to cloud automatically. For OneNote, if you have a Windows 10/11 PC, OneNote is likely already installed (as OneNote for Windows or “OneNote 2016”). If not, you can download it for free or use the web version via OneDrive (you need a Microsoft account, which can be a personal one or your Office 365 login). On Mac or mobile, OneNote apps are available for free in the app stores. With OneNote, consider using a single notebook for the whole team or multiple notebooks by project (OneNote is quite flexible, but too many notebooks can be unwieldy). If using a team notebook, store it on a shared space (e.g., in SharePoint/Teams or a shared OneDrive folder). Then everyone with access can contribute. Leverage OneNote’s integration: you can pull in Outlook meeting details or email messages into OneNote for context, and later find them via search. It's great for meeting minutes: one person writes minutes in OneNote during the meeting, and right after, they can share that page via email or link with everyone. For personal use, OneNote can also be like your daily planner or idea log. Use whichever of Evernote/OneNote aligns with your workflow (if you’re heavy Microsoft users, OneNote might be more seamless; if you like Evernote’s interface or cross-platform consistency, go that route). Both can export your data if you ever need to switch, so you’re not locked in. By adopting a note-taking app and encouraging its use, you cut down on knowledge lost when someone leaves (because their notes were in a closed notebook no one sees) and improve continuity (new staff can read back through old notes to get context). And you’ll likely feel more organized and less stressed about remembering everything. All for free – a pretty good deal.
53. Zapier (Workflow Automation)
What it does: Zapier is an automation tool that connects different web apps together. It lets you create “Zaps” – simple automation workflows where an event in one app triggers an action in another. For example, “When a new row is added to my Google Sheet, send an email via Gmail” or “If a new donation comes in via PayPal, add the donor to my CRM and Slack the team”. It requires no coding – you use a point-and-click interface to set it up.
Why it’s great: It can save a ton of manual work and ensure nothing slips through the cracks by automating routine tasks and data transfer between services. Nonprofits and startups often use a patchwork of free/cheap tools (e.g., Wufoo forms, Mailchimp, Trello, Google Sheets, etc.). Zapier is like the glue that can make them work in unison without you acting as the human API. For instance, let’s say you have an online event sign-up form on Typeform – Zapier can automatically take those responses and create Zoom meeting registrants or put them into a Mailchimp list for reminders. Or if you star a Gmail message, Zapier could create a task in Asana so you remember to follow up. The possibilities are endless, and they have integrations for thousands of apps. Zapier’s free plan allows 5 single-step Zaps and 100 tasks/month – which is enough to automate a few small things (like maybe sending yourself SMS alerts for certain emails, or copying form entries to a spreadsheet). Importantly for this context, Zapier offers 15% off to nonprofits on paid plans, and they sometimes give higher discounts or sponsorships if you directly approach them with your mission story. Also, if you’re a coding-savvy startup, an alternative is writing your own integrations or using a more open-source tool like n8n (which is free self-hosted), but for ease and speed, Zapier is hard to beat. By automating workflows, you reduce errors (no more forgetting to add that person to the newsletter or failing to back up data) and free up human time for more valuable work. It’s like hiring a very diligent (if limited) assistant to do the busywork – and often the ROI is immediate when you consider time saved.
How to get it: Identify a repetitive or multi-app process you’d like to streamline. Then sign up for a Zapier free account. The interface will prompt you to create a Zap: you first choose a Trigger app and event (e.g., “Google Forms – New Response”), connect your account for that app, then test it. Next, choose an Action app and event (e.g., “Google Sheets – Create Spreadsheet Row”), connect and test. Once you turn on the Zap, it will run automatically whenever the trigger event happens. Some popular easy wins: connecting form tools (Google Forms, JotForm, etc.) to email or to Slack for instant notifications; syncing new CRM contacts to a Google Sheet backup; posting social media thanks when someone donates via PayPal (Zapier can watch PayPal and then post a templated thank-you on Twitter, for example). Explore Zapier’s “Popular Zaps” for inspiration. Keep in mind free Zaps run every 15 minutes (paid can be as fast as 1 minute). If you hit the free plan limit (100 tasks can go quick if say you automate every email to create a task), you might consider upgrading to Starter plan (starts around $20/mo for 750 tasks) – if so, use the nonprofit discount request form via Zapier’s help or email their support with proof of nonprofit status to get 15% off continuously. They also have a referral program – if you refer other orgs, you get credits. Also, remember multi-step Zaps (e.g., trigger -> do A -> do B -> do C) require a paid plan; free can only do one action per zap. You can sometimes chain free zaps by using an intermediary like “Webhooks by Zapier” to hand off, but that’s advanced. One more thing: check if any software you use already has built-in automation (e.g., Google Workspace has Apps Script, Microsoft 365 has Power Automate – nonprofits get some Power Automate with Office licensing). If not, Zapier is the go-to. Over time, monitor your Zaps to ensure they still work after any app changes passwords or APIs update. Zapier will email if a Zap errors out. The more you automate, the more you’ll trust it and find new ways to streamline operations. And staff will likely feel relief that some dull parts of their job are handled automatically, letting them focus on impact.
54. Calendly (Scheduling Tool)
What it does: Calendly is a scheduling tool that lets others book appointments or meetings with you based on your availability, without the back-and-forth emailing. You set up your calendar availability and meeting preferences, then share a link. People pick an open slot, and Calendly handles adding it to your calendar and sending notifications.
Why it’s great: For nonprofits and startups, time is precious and scheduling can be a hassle – especially when coordinating across organizations or time zones. Calendly’s basic version is free and allows one event type (like a 30-minute meeting) and connects to one calendar (Google, Office 365, Outlook, or iCloud). You can embed it on your website or email a link saying “pick a time to talk with me”. For example, a nonprofit’s volunteer coordinator can send a Calendly link to new volunteers so they can choose a slot for orientation, saving dozens of emails per month. Or a startup founder can use it to schedule investor or customer calls efficiently. It eliminates the “Does Tuesday at 3 work? No? How about Wednesday at 1?” threads. Also, it automatically handles time zone detection for the invitee, which is great if you collaborate globally. The free plan even sends automated confirmation emails (and you can integrate with Google Meet or Zoom to auto-create a meeting link in paid versions or via other means). Calendly’s paid plans (starting $8/month) add features like multiple event types (15-min, 30-min, etc.), group events, customization, and SMS reminders. Some of those are very nice as you expand (for instance, scheduling a webinar or round-robin assignment for a team). But many small orgs find the single event type on free is enough, especially if it’s just one person’s calendar. Calendly also offers discounts for nonprofits and educational institutions (typically 20% off paid plans; you contact their support with proof). And there are alternatives too: Microsoft Bookings (included in some Office 365 plans) or Google’s Appointment Slots (less polished but free with Google Calendar), or other free tools like Koalendar or Harmonizely. However, Calendly has become somewhat of a standard due to its simplicity and integration options (works with Zoom, Stripe for paid appointments, etc.). In terms of professionalism, giving someone a scheduling link can also send a message that your organization is modern and respects their time. Some etiquette: you might still offer a personal note like “Feel free to grab a time on my Calendly or suggest others that work for you” – some people unfamiliar might find a cold link impersonal at first. But once they try it, many love it.
How to get it: Go to Calendly.com and create a free account. Connect your calendar (most likely your Google or Outlook calendar) – this is important because Calendly will read your busy times to avoid double-booking, and it will create events on it for new meetings. Set your available hours (e.g., 9am-5pm Mon-Fri, or narrower if you only take meetings certain times). Set your meeting preferences: default length (30 min or whatever), buffer time (maybe you want 15 min gap between meetings), maximum number of meetings per day, etc. You’ll get a personal scheduling link like calendly.com/YourName. Test it out by opening that link in incognito and booking a dummy slot to see how it flows. Once satisfied, share it strategically: add to your email signature (“Schedule a meeting: [link]”), or when someone emails to meet, reply with the link as an option. You can also embed a Calendly widget on your Contact Us page so that, say, prospective donors or clients can directly book intro calls. Check that calendar invites and email confirmations are going out (Calendly sends those automatically). If you need group events (e.g., let 5 people book the same slot for a group training) or multiple event types (maybe a 15-min quick call vs a 1-hr deep dive), consider a paid upgrade. If you do, before paying, reach out to Calendly support to ask about nonprofit/edu discounts – they’ll usually provide a coupon or code if you qualify. Over time, adjust your availability if you find you’re getting booked too much (you can limit, for example, no more than 4 meetings per day). Also, use Calendly’s features like adding custom questions (e.g., “What would you like to discuss?”) to gather info, even on free you get a couple of those. The time saved by Calendly can be significant – imagine eliminating 5-6 emails per meeting scheduled. Over months, that is hours of admin time you get back. And that means more focus on mission-critical tasks.
Too many tools, not enough coordination?
I audit your full tech stack and recommend what to keep, kill or combine. Start a systems audit or chat to me about what’s realistic for your team.
Technology can be a force-multiplier for nonprofits and startups – and as we’ve seen, you don’t need a big bank account to leverage world-class tools. By tapping into these free and discounted resources, even the smallest organization can fundraise more effectively, streamline operations, collaborate from anywhere, design eye-catching content, market their mission, secure their data, manage their stakeholder relationships, mobilize volunteers, analyze their impact, and continuously learn new skills.
The tools listed here lower the barrier to entry so that mission-driven organizations in South Africa (and beyond) can punch above their weight in the digital arena. A bit of time invested in setting up and learning these platforms can save you countless hours and Rands in the long run – freeing you to focus on what truly matters: delivering value to your community and growing your vision.
Lastly, remember that new tools and offers emerge all the time. Keep an eye on communities like TechSoup South Africa or startup forums for the latest freebies and deals. And if you need personalized guidance on choosing or implementing any of these solutions, don’t hesitate to reach out.
Feel free to bookmark this post as a reference, share it with fellow changemakers, and let us know which tools you end up using. Together, let’s leverage technology to amplify impact – without breaking the budget!
Want help making the most of these tools?
I work with South African NPOs and startups to build lean, effective systems that actually get used. Explore the full service or send a message to see what setup fits your org best.